
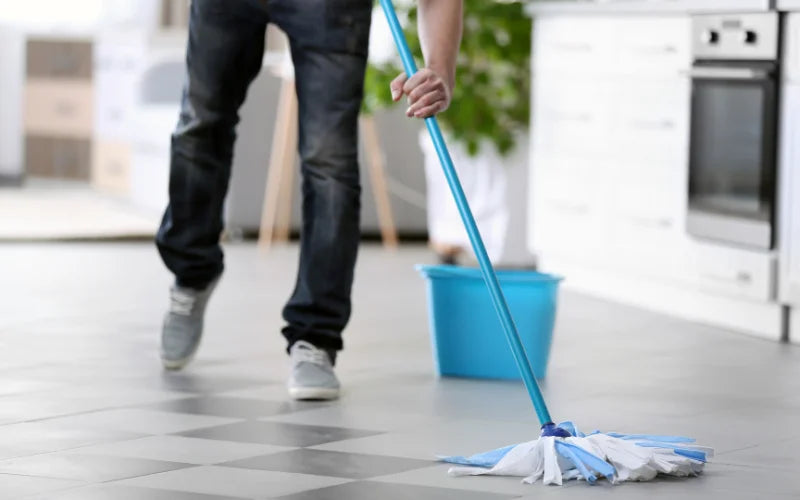
Imagine stepping into your kitchen and being greeted not by stubborn stains or the dull grime of wear-and-tear, but by gleaming tiles that add lustre to your sanctuary for culinary creation. A clean, shiny kitchen floor changes the atmosphere in your home while promoting health and hygiene. In this blog post, we will walk you step by step through a simple yet efficient routine to clean your kitchen tile floor. Uncover trade secrets and say goodbye to dirt, grime, and bacteria while restoring the sparkle on every tile underfoot! Say hello to a cleaner kitchen, starting from the ground up.
The best method for cleaning a kitchen tile floor will depend on the type of tile you have, but generally warm water and a mild dish soap or vinegar solution can be effective. It is important to sweep the floor regularly to prevent dirt buildup, and any spills or wet spots should be wiped up immediately. For stubborn stains on grout lines, a paste of baking soda and water or a grout cleaner can help. Avoid using abrasive cleaners or rough tools that may damage the tiles.
Treating Different Kitchen Floor Tiles

When it comes to cleaning kitchen tile floors, it's important to understand that different types of tiles require specific treatment. Ceramic, porcelain, and other natural stone tiles each have their unique characteristics and cleaning requirements. By tailoring your cleaning approach accordingly, you can ensure the longevity and beauty of your kitchen floor.
Take a closer look at the two most common types of kitchen floor tiles - ceramic and porcelain - and explore their respective cleaning methods.
Ceramic Tiles Cleaning Method

Ceramic tiles are a popular choice for kitchen floors due to their durability and resistance to stains. Cleaning ceramic tiles is relatively straightforward, but its essential to follow the correct method to maintain their appearance.
To start, sweep or vacuum the floor with a soft bristle broom or brush attachment to remove loose debris. This step helps prevent scratching during the cleaning process.
Next, prepare a cleaning solution by mixing warm water with a mild dish soap. Avoid using harsh chemicals or abrasive cleaners as they may damage the tile surface. Imagine using a rough scrubber on delicate ceramic tiles; it would be akin to using sandpaper on fine china!
Dip a mop or sponge into the soapy water and wring it out well. You want the mop or sponge to be slightly damp rather than dripping wet. Think of it as giving your kitchen floor a gentle bath rather than drowning it in water!
Gently mop the ceramic tile floor, working in small sections at a time. Avoid excessive scrubbing or applying too much pressure, as this can cause unnecessary wear on the grout lines.
Once you've cleaned the entire floor, rinse the mop or sponge thoroughly, then go over the tiles again with clean water to remove any soapy residue.
One crucial point to remember when dealing with ceramic tiles is that they should be dried immediately after washing. Allowing water to stand on the tiles can lead to unsightly water spots or even damage to the grout.
Its also worth noting that regular maintenance, such as sweeping or vacuuming, can prevent dirt and grit from accumulating, ultimately reducing the frequency of deep cleaning required. So, make it a habit to keep your kitchen floor free from debris on a regular basis.
Now that we've covered the cleaning method for ceramic tiles, let's move on to tackling porcelain tiles - another popular choice for kitchens.
According to the Tile Council of North America, not cleaning up spills immediately can result in over 70% more staining on tile surfaces. In a survey conducted by NSF International, 36% respondents admitted that they don't clean their kitchen floors on a weekly basis as recommended, potentially leading to build-up of harmful bacteria. A study by the University of Arizona found that traditional mopping methods leave significant amounts of bacteria behind - up to 30% on ceramic tiles - urging the need for better cleaning solutions and methods.
Porcelain Tiles Cleaning Process

Cleaning porcelain tiles requires a careful process to ensure effective removal of dirt and grime while preserving the beauty and integrity of the tiles. Let's walk through the step-by-step guide to cleaning your porcelain tile floor.
Sweep or vacuum: Begin by removing loose debris from the floor using a broom or vacuum cleaner. This step prevents dirt particles from scratching the tiles during the cleaning process.
Prepare a cleaning solution: Mix a mild detergent or specialized porcelain tile cleaner with warm water. Follow the manufacturer's instructions for the appropriate dilution ratio. Avoid using acidic or abrasive cleaners that can damage the surface of the tiles.
Test in an inconspicuous area: Before applying the cleaning solution to the entire floor, test it on a small hidden area to ensure it doesn't cause any discoloration or negative effects on your tiles.
Apply the cleaning solution: Use a mop or sponge dampened with the cleaning solution to apply it evenly across the floor. Work in sections, focusing on one small area at a time.
Scrub gently: For tougher stains or grime buildup, you may need to gently scrub with a soft-bristled brush or non-abrasive scrub pad. Be cautious not to use excessive force that could scratch or damage the tile surface.
Rinse thoroughly: Once you have cleaned all sections of the floor, rinse away any remaining detergent residue with clean water. Ensure complete removal of soap to avoid leaving behind streaks or sticky residues.
Dry the floor: Use clean dry towels or allow the floor to air dry completely before walking on it again. This helps prevent slips and falls while ensuring no moisture gets trapped between tiles.
Remember, regular maintenance is key to keeping your porcelain tile floors looking their best. Promptly clean up spills, wipe away dirt, and regularly sweep or vacuum to prevent any scratches or stains from setting in.
Essential Cleaning Tools and Products

Now that you have an understanding of the porcelain tile cleaning process, let's discuss the essential tools and products you'll need to ensure effective and efficient cleaning.
Microfiber mop: A microfiber mop is ideal for cleaning porcelain tiles as it effectively traps dirt and dust particles without scratching the surface. Look for a mop with a removable and machine-washable mop head for convenient maintenance.
Soft-bristled brush or non-abrasive scrub pad: These tools are useful for gentle scrubbing of tougher stains or grime buildup on your porcelain tiles. Opt for brushes with soft bristles that won't cause damage.
Mild detergent or specialized porcelain tile cleaner: Choose a mild detergent suitable for cleaning porcelain tiles, or opt for a specialized porcelain tile cleaner recommended by the manufacturer. Avoid harsh abrasive cleaners that can cause damage over time.
Water: Clean water is essential for rinsing away cleaning solutions after they have done their job. Ensure you have access to clean water throughout the cleaning process.
Clean towels or cloths: You'll need these to dry the floor after cleaning to prevent slips and falls. Make sure they are clean and absorbent for effective drying.
Having these essential tools and products at hand will make your porcelain tile cleaning process smoother and more effective, allowing you to maintain the pristine appearance of your floors with ease.
Choosing the Right Mop

When it comes to effectively cleaning kitchen tile floors, choosing the right mop is crucial. Not all mops are created equal, and selecting the right one can make a significant difference in achieving a sparkling clean surface. So, what factors should you consider when choosing a mop for your kitchen tile floors?
First and foremost, it's essential to look for a mop that is lightweight and easily maneuverable. This will make your cleaning experience more comfortable and less tiring. Additionally, consider a mop that is adjustable in height so that you can easily clean under furniture and reach those hard-to-reach places. After all, nobody wants to strain their back while trying to get every corner of their kitchen floor spotless.
Imagine having a lightweight mop with an adjustable handle that allows you to effortlessly glide across your kitchen tile floors, reaching even the most hidden spots under the cabinets or appliances. Cleaning becomes a breeze without any unnecessary strain on your body.
Another factor to consider is the type of mop head. Microfiber mop heads are highly recommended for cleaning kitchen tile floors. These soft and absorbent materials capture both wet and dry messes efficiently, leaving your floors free of dust, dirt, and spills. Additionally, microfiber pads are often washable, which not only saves you money in the long run but also reduces waste.
Now that we’ve explored what factors to consider when choosing the right mop for your kitchen tile floors, let's move on to tackling stubborn stains effectively.
Cleaning Method for Stubborn Stains

Stubborn stains on kitchen tile floors can be frustrating, but with the right cleaning method, they can be effectively tackled. One powerful weapon in your cleaning arsenal is leveraging bleach solutions. Bleach is known for its ability to remove tough stains and disinfect surfaces.
Before starting the cleaning process, make sure to protect yourself by wearing gloves and ensuring proper ventilation in the area. To create a bleach solution, mix one part bleach with three parts water in a bucket or spray bottle. It's important to always follow the instructions on the bleach product and test it in a small inconspicuous area before applying it to the entire stained surface.
Imagine encountering a stubborn red wine stain on your kitchen tile floor after hosting a lively dinner party. By harnessing the power of a carefully prepared bleach solution, you apply it to the stain, watching as it gradually fades away, leaving your tiles looking pristine once again.
Apply the bleach solution directly to the stubborn stain and let it sit for a few minutes to allow it to penetrate and break down the stain. Then, using a scrub brush or mop with firm bristles, gently scrub the stained area in a circular motion. Be careful not to scrub too aggressively, as this could damage your tile flooring. After thoroughly scrubbing, rinse the area with clean water and dry it with a soft cloth or mop.
Cleaning stubborn stains may require some extra effort, but the results are worth it when you see your kitchen tile floors restored to their original cleanliness. Now that we've explored effective cleaning methods for stubborn stains, you can confidently tackle any tough spots on your kitchen flooring.
Bleach solutions can be a powerful tool for removing stubborn stains on kitchen tile floors. When using bleach, it's important to protect yourself by wearing gloves and ensuring proper ventilation in the area. Always follow the instructions on the bleach product and test it in a small inconspicuous area before applying it to the entire stained surface. Apply the solution directly to the stain, let it sit, then gently scrub the area in a circular motion with a scrub brush or mop with firm bristles. Rinse with clean water and dry with a soft cloth or mop. Cleaning stubborn stains may require extra effort but with the right method, you can restore your kitchen tiles to their original cleanliness.
Leveraging Bleach Solutions

When it comes to tackling tough stains and disinfecting your kitchen tile floor, leveraging bleach solutions can be an effective approach. However, it is important to exercise caution and follow proper safety measures when using bleach.
Bleach is a powerful cleaning agent that can effectively remove stubborn stains, kill bacteria, and sanitize the surface. It can be particularly useful for tackling mold and mildew in grout lines. However, it is essential to handle bleach with care and ensure proper ventilation in the room. Always wear gloves and protective eyewear to avoid any direct contact with your skin or eyes. Additionally, never mix bleach with other cleaning agents or ammonia-based products as this can produce harmful fumes.
To create a bleach solution for your kitchen tile floor, start by diluting regular household bleach with water. A common recommendation is to mix one part bleach with four parts water. Ensure you read the instructions on the bleach bottle for specific guidelines on dilution ratios as they may vary between brands.
Once you have your bleach solution ready, you can apply it to your tile floor using a sponge or mop. Begin by spot testing a small inconspicuous area of the floor to ensure that the solution does not cause any damage or discoloration. If all looks well, proceed to apply the solution generously over the stained areas or grout lines.
After applying the bleach solution, allow it to sit on the surfaces for a few minutes to effectively break down stains and kill bacteria. Then, using a soft-bristle brush or an old toothbrush, gently scrub the stained areas or grout lines in circular motions. This will help loosen any embedded dirt or discoloration.
Once you have finished scrubbing, thoroughly rinse the floor with clean water to remove any remaining bleach residue. It is crucial to rinse the area thoroughly to prevent any potential damage from prolonged exposure. After rinsing, use a clean towel or mop to dry the floor completely.
For example, if you have stubborn stains on your kitchen tile floor due to food spills or heavy traffic, using a bleach solution can help lift and remove those stains effectively.
By leveraging bleach solutions appropriately and following safety precautions, you can enhance the cleanliness and appearance of your kitchen tile floor.
Now that we’ve explored how bleach solutions can be utilized for cleaning, let's shift our focus towards effective grout cleaning techniques.
Grout Cleaning Techniques

Grout lines are notorious for accumulating dirt, grime, and discoloration over time. To maintain a pristine kitchen tile floor, it's essential to pay attention to cleaning the grout lines as well. Here are some effective grout cleaning techniques to consider:
One popular technique is using a toothbrush or small scrub brush dipped in a paste made from equal parts of baking soda and water. Scrub this paste onto the grout lines in small circular motions. The slightly abrasive nature of baking soda helps break down dirt and stains, while its natural properties assist in deodorizing the area. After scrubbing, rinse the grout lines thoroughly with clean water.
Another option is employing a store-bought grout cleaner that contains chemicals designed specifically for deep-cleaning grout. Follow the instructions on the cleaner's packaging carefully and apply it directly to the grout lines. Allow it to sit for the recommended duration before scrubbing lightly with a brush. Rinse thoroughly afterward to ensure all residue is removed.
Some may wonder whether homemade solutions or commercial cleaners are more effective for cleaning grout lines. While both options have their merits, it ultimately depends on the severity of the dirt and stains and personal preferences. Homemade solutions provide a natural and cost-effective approach, while commercial cleaners often contain specialized ingredients for targeting tough grout stains.
For instance, if you have moderate staining or want to avoid harsh chemicals, the baking soda paste technique might be a suitable choice. On the other hand, if you're dealing with heavy discoloration or prefer the convenience of ready-made solutions, investing in a commercial grout cleaner can yield effective results.
Remember to test any cleaning solution on a small area first to ensure it doesn't damage or discolor your grout lines.
By adopting these grout cleaning techniques and dedicating regular maintenance, you can keep your kitchen tile floor looking fresh and vibrant.
Homemade Solution for Grout Lines

Grout lines can be a breeding ground for dirt, grime, and stains, and cleaning them effectively is crucial to maintaining the pristine look of your kitchen tile floor. While there are numerous commercial cleaners available in the market, you may also opt for homemade solutions that can be just as effective and more environmentally friendly.
One popular homemade solution for cleaning grout lines involves the use of baking soda and water. Baking soda is a versatile ingredient known for its excellent cleaning properties. To create the solution, simply mix equal parts of baking soda and water to form a thick paste. Then, using an old toothbrush or a grout brush, apply the paste onto the grout lines and scrub gently in a circular motion.
The grittiness of baking soda helps to loosen and remove dirt and stains from the porous grout surface effectively. Additionally, it acts as a mild abrasive without causing damage to the tiles themselves. This homemade solution is suitable for both ceramic and porcelain tile floors.
Imagine you have stubborn stains on your kitchen floor's grout lines that regular cleaning products fail to remove. You decide to give this homemade solution a try. With a mixture of baking soda and water pasted onto the stained grout lines and your trusty old toothbrush in hand, you start scrubbing away at the stains. Slowly but surely, you notice the stains fading away, revealing clean and bright grout lines.
Another commonly used homemade solution for cleaning grout lines is vinegar and water. Vinegar has natural acidic properties that work effectively against dirt and stains. For this solution, create a mixture using equal parts of white vinegar and warm water in a spray bottle. Spray the solution directly onto the grout lines, ensuring they are thoroughly saturated. Allow it to sit for about ten minutes before scrubbing with a brush or sponge.
Depending on the severity of the stains, you may need to adjust the concentration of the vinegar and water mixture. For tougher grout stains, you could increase the proportion of vinegar, but be cautious when using it on natural stone tiles, as it can potentially etch or damage their surface.
It's important to note that while these homemade solutions can be effective, they may not work for all types of stains or grout lines. More stubborn stains might require additional methods or specialty cleaners. Additionally, it's always a good idea to test any homemade solution on a small, inconspicuous area of your kitchen tile floor before applying it to larger areas.
With a little bit of patience and some DIY spirit, you can tackle grout line cleaning with a homemade solution. Whether you choose baking soda and water or vinegar and water, both options provide an affordable and eco-friendly alternative to commercial cleaners. Remember to use proper protective gear such as gloves and ventilation when working with these solutions. Embrace the satisfaction of seeing your kitchen tile floor looking fresh and renewed after giving those grout lines some extra attention.